Inventory Manager
From PropertyMinder WIKI

The PropertyMinder system uploads your featured and office listings automatically to your Inventory Manager
You also can:
- Add listings and properties that you may not have put on the MLS (pocket listings, exclusives, rentals etc) to the Featured Listings page on your website. You may even want to add homes you have sold in the past.
- Load your featured listing from the MLS.
- Update (edit) listing information.
- Create the photo album - add more photos to your featured listing. Sort the listing photos.
- Add a virtual tour, if applicable.
- Add any custom link to your featured listing. This feature is used to provide title reports, disclosures, etc online.
- Hide/show address and map of the property.
- Hide/show the hit counter tracking the number of people who viewed your featured listing.
- Separate your active, new, sold listings into different pages of your website
- Add Disclosure Documents to your listing and set up password access to them.
Contents |
To add a Listing/Property to the website
To manually add listing to your website you need to:
- Login to your Toolkit and go to Inventory Manager.
- Click on the Add New Listing Manually button.
- Add a Photo to a Listing/Property. You may read here how to prepare your photos for publication on the web.
- Click on the Browse button to locate the image on your computer.
- Locate the file/directory.
- Double click on the file you want to use. If you can't see your file above, try changing the Files of type: to All Files (*.*).
- Click on the Upload Photo button.
- Add more photos.
- Add Virtual Tour Link to a Listing/Property. Name the link and paste the web address (URL).
- You can add the custom link that will show Disclosers, specific area reports or anything you want. Name the link and put web address (URL).
- Add General Information (the required fields are marked in red).
- Type an attention grabbing description for the property in the Description field.
- Add Property Features. You may check as many features as you want.
- Click on the Submit button to add the new Listing/Property to your personal website.
To add the Listing from MLS you need to:
- Login to your Toolkit and go to Inventory Manager.
- Type in the MLS number in the Load your Featured Listing from MLS input box.
- Click Submit.
- The listing will appear in your list. Now you can modify it (add photos, description, etc)

To modify listing information
You also have the option to modify the information on listing loaded from the MLS. To modify such listing click on the Update link on right side of the Listing table. You can make the following changes to listings that have been extracted from the MLS either automatically, or that have been loaded from the MLS:
- Change/update the main picture.
- Add additional photos: create a photo album by clicking the photo album: link.
- Add/update the virtual tour link.
- Add a custom link for the listing.
- Modify the description of the listing using the HTML editor, which allows you to add links and format the description.
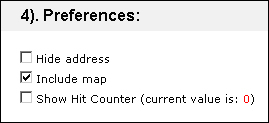
- Select hide address, include map, or show the hit counter.
To delete a listing from the Inventory Manager
Find the listing that you would like to delete and check the box labeled, Delete on the right hand side of the listing. Do this for any listings shown on the page that you want to remove. When finished, click the blue link at the top labeled, delete all checked.
![]() WARNING! All "Removed" listings are permanently removed.
WARNING! All "Removed" listings are permanently removed.
To change the order of the listings
- Go to the Inventory Manager.
- Use the first blank field (##) to order the listings in increments of 10.
- Click the save listings order (##) link above or below listings table.
If you would like to show different listings on different pages of your website refer to PropertyLists.
To block other PropertyMinder users from showing your listings
You can block listings from appearing on other PropertyMinder subscribers' websites.
- Login to your Toolkit and go to the Inventory Manager.
- Next to the listing, click Permissions.
- On the Edit Listing Permissions page, select your option. If you select to block the listing from other PropertyMinder users, they cannot add it onto their websites.
Furthermore, if this listing is already added onto their sites, it will get deleted.