Office Solution
From PropertyMinder WIKI
Contents |
How to edit company information
- Click the Administration button on the left screen of your Toolkit.
- Enter the relevant company information in the Administration page.
Agent Roster
In the agent roster, you can:
- Manage the agent contact information and profile displayed on your website.
- Add new agent profiles to your office website.
- Add additional office locations and associated agents to your website.
To add new agents
![]()
- Click the Agent Roster.
- On the Agent Roster page, click the Add Agent button.
- Enter the relevant information about the agent including:
- Agent Name
- Title
- Contact Information
- MLS Information (Agent ID/DRE number)
- Photo
- Web page address
- Slogan, Biography and additional statements
- Click Save to save changes.
To edit, view and delete existing agent profiles:
- Click the Agent Roster.
- On the Agent Roster page, use the action links (view, edit or delete) corresponding to the particular agents name.
You can also link your office website with your agent's PropertyMinder website to have the ability to transfer your leads between agents.
To link the profile:
- Click the Agent Roster.
- On the Agent Roster page, click the Links Agent button.
- Enter your realtor's PropertyMinder website address and click Link. The realtor will receive the invitation. When realtor accept the invitation from the Toolkit you will the record in your Agent Roster.

Leads Routing
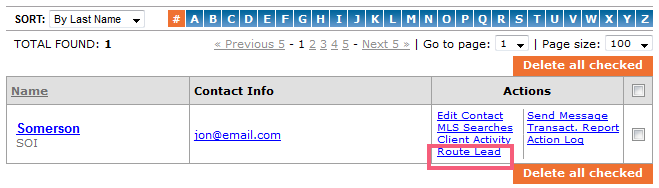
- To transfer leads to your agents go to your office CRM and click Contact list
- Chose the contact you would like to pass and click Rout lead.
-
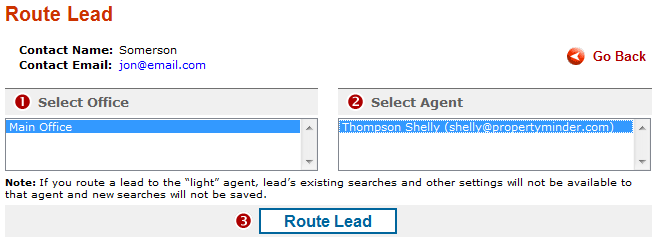
- Chose the agent and click Rout lead again.
-
Our system will send the notification email to the agent and the lead appears in Leads routing page if the Toolkit.

When the agent accept the lead, it will appear in agent's CRM as contact.
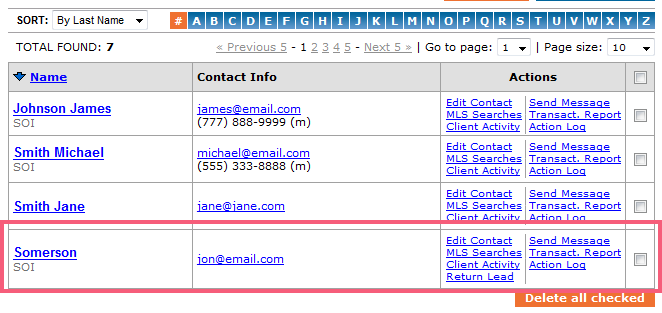
At any moment the agent can pass the lead back by clicking Return lead on Leads routing page.
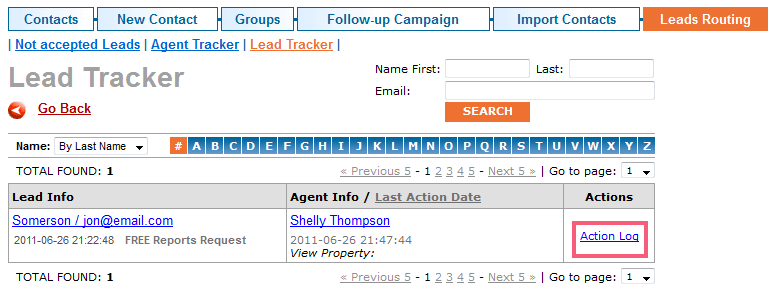
- To see how you agent is working with the lead go to Leads Routing tab of your CRM and open Lead Tracker page. Click Action log link next to the lead.
- You may find the list of lead which were not yet accepted by agents on Not accepted Leads page of Leads routing.
- To see the full list of agents and leads transferred to them open Agent tracker page.
To add a new office
- Click on the Agent Roster.
- On the Agent Roster page, click the Add Office button.
- Enter the relevant information about the agent including:
- Office Name
- Contact Information
- Office Address
- Areas served by the office
- MLS Information (Office Broker Code)
- Click the Save button to save changes.