How to use my own picture instead of an animation on the Animated Designs
From PropertyMinder WIKI
(Difference between revisions)
| Line 8: | Line 8: | ||
# Use the '''Browse''' button to search through the folders on your computer for the image you want to use. When found, select it, and click on '''Open''' | # Use the '''Browse''' button to search through the folders on your computer for the image you want to use. When found, select it, and click on '''Open''' | ||
#: [[File:Upload_picture1.jpg|border|link=http://wiki.propertyminder.com/images/f/f6/Upload_picture1.jpg]] | #: [[File:Upload_picture1.jpg|border|link=http://wiki.propertyminder.com/images/f/f6/Upload_picture1.jpg]] | ||
| - | #: [[File:Upload_picture2.jpg|border| | + | #: [[File:Upload_picture2.jpg|border|800 px|link=http://wiki.propertyminder.com/images/3/34/Upload_picture2.jpg]] |
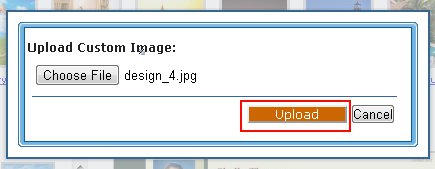
# You will need to click the upload button to upload the file | # You will need to click the upload button to upload the file | ||
#: [[File:Upload_picture3.jpg|border|link=http://wiki.propertyminder.com/images/0/00/Upload_picture3.jpg]] | #: [[File:Upload_picture3.jpg|border|link=http://wiki.propertyminder.com/images/0/00/Upload_picture3.jpg]] | ||
# Don't forget to '''Save''' your changes at the bottom | # Don't forget to '''Save''' your changes at the bottom | ||
Latest revision as of 01:40, 19 October 2011
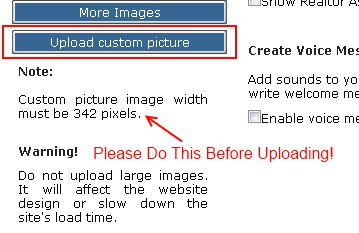
NOTE: Your image will need to be 342 pixels wide prior to uploading for the best results.
- Login to your Toolkit
- Open the Website Editor
- Click on Configure Design
- On the left hand side, click on Upload Custom Picture
-
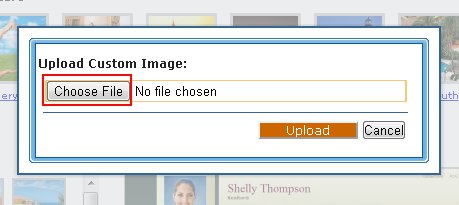
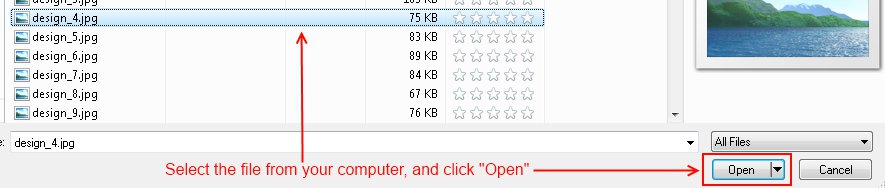
- Use the Browse button to search through the folders on your computer for the image you want to use. When found, select it, and click on Open
-
- You will need to click the upload button to upload the file
-
- Don't forget to Save your changes at the bottom