Add custom pages
From PropertyMinder WIKI
How can I add custom pages to my website?
You can create and add unlimited Custom Pages to your website. A Custom Page is one that you create yourself. This will show as a link to your website.
To add a new custom page:
- Login to the Toolkit
- Click on the Website Editor link on the left side of the screen.
- Click on the Buttons icon.
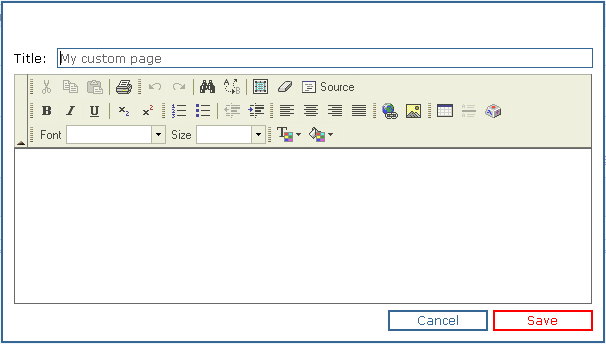
- Click on Create Custom Page link.
- Name your button
- Type in your text, change the format, add images and more.
- Click Save to finish. Your button will now appear at the end of your list. You need to click Enable to activate it on your website
- You can change the sequence of your links or buttons on the website by simply clicking on the button number and changing it.
To add an HTML page:
- Login to the Toolkit.
- Click on the Website Editor link on the left side of the screen.
- Click on the Buttons icon.
- Click on Create Custom Page.
- Click on Source link.
- Name your page and type in your text inserting appropriate HTML tags.
- Click Save to finish.
What can I do with the Custom Files Manager?
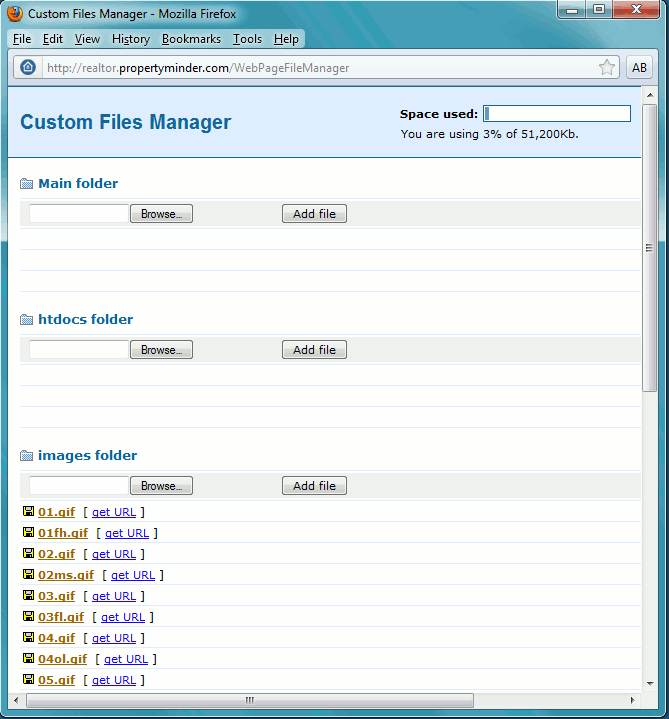
The Customs Files Manager allows you to upload, store and organize files and images before you insert them into a custom page.
To add a file to the Custom Files Management
- Click Website editor on the left panel of the Toolkit page.
- Click on the Buttons icon.
- Click the Custom Files Management link.
- On the Custom Files Manager window, go to the main folder section if you are uploading a document or go to the image folder section if you are uploading a photo. Click the Browse button and choose the location of the file from your local computer.
- After selecting the file, click Add File to add the file to the "Custom Files Manager".
- To delete a file, click the trashcan icon next to the file.
- The file is now saved on the "Custom Files Manager". You can now insert the image file into the Custom Pages, About Me, or in any messages that you would like to send out to your clients within the PropertyMinder CRM.
How can I add a link to a file saved on my local computer?
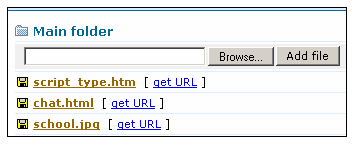
You can upload a non-image file to the custom file manager in the main folder and then add a link/button to the file on your website. To do this:
- Click Website Editor on the left panel of the Toolkit. Click on the Buttons icon.
- Click the Custom Files Management link.
- In the window that appears, in the Main folder section, click the Browse button and choose the location of the file from your local computer.
- After selecting the file, click Add File to add the file to the Custom Files Manager.
- To delete a file, click the trashcan next to the file.
- The file is now saved in "Custom Files Management". You can now click the get URL link next to the file name.
- This will bring up a small window with a link to the saved file.
- Copy the link from the window, return to the "Buttons" page.
- Click the Add New Link button. Name your link. Paste the URL link that you copied from your Custom Files Manager into the URL box as shown below. Be sure not to duplicate the "http://" string!
- Click Save to finish. Your button will now appear at the end of your list. You need to click Enable to activate it on your website.
- Specify the order of your buttons or links by entering an appropriate number.
- Go to your website homepage and test the link by clicking the name of the button/link.
How can I add a custom link on my website?
You can add as many links to your website as you like. These links will be shown on your website in the order you specify (ascending order).
To add a new link:
- Login to the Toolkit. Click on Website Editor on the left hand side of the screen.
- Click on the Buttons icon.
- Click the Add New Link button. Name your link. Put the website address of the site you wish to link to, into the URL box as shown below. Be sure not to duplicate the http:// string.
- Click Save to finish. Your button will now appear at the end of your list. You need to click Enable to activate it on your website.
- Specify the order of your buttons or links by entering an appropriate number.
![]() NOTE: Our editor recognizes basic HTML tags.
NOTE: Our editor recognizes basic HTML tags.
How do I change the order of my links on the homepage?
- Login to your Toolkit and open Website Editor page.
- Click Buttons link.
- On the left side of every page on your website there is a number assigned to the pages. Click on the number and change it. The system automatically reorders your pages.


