Changing the Scrolling photos on the HomeScape Template
From PropertyMinder WIKI
(Difference between revisions)
(Created page with "# Login to your '''Toolkit''' and then select '''Website Editor'''. # Select '''Custom Website Designer'''. # Select '''Colors and Settings'''. # Scroll down to the '''Banner''' ...") |
|||
| Line 4: | Line 4: | ||
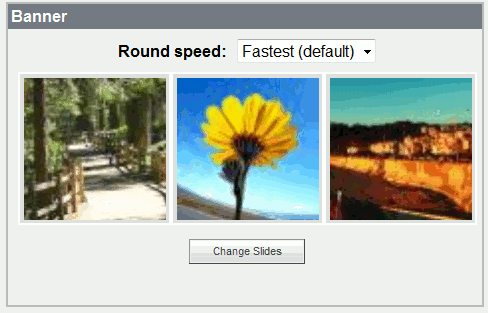
# Scroll down to the '''Banner''' section and select '''Change Slides'''. | # Scroll down to the '''Banner''' section and select '''Change Slides'''. | ||
#: [[File:HomeScape04.gif|border|link=http://wiki.propertyminder.com/images/f/ff/HomeScape04.gif]] | #: [[File:HomeScape04.gif|border|link=http://wiki.propertyminder.com/images/f/ff/HomeScape04.gif]] | ||
| - | # | + | # If you would like to upload your own custom photos, select ''''Custom Files Management'''. |
#: You will then be able to scroll through your computer to upload your photos. | #: You will then be able to scroll through your computer to upload your photos. | ||
#: Now go to the '''Custom Files''' tab and you will be able to select and order your custom photos. Select '''Save''' when finished. | #: Now go to the '''Custom Files''' tab and you will be able to select and order your custom photos. Select '''Save''' when finished. | ||
# If you would like to use the default photos, select '''Media Library'''. | # If you would like to use the default photos, select '''Media Library'''. | ||
Latest revision as of 04:45, 20 June 2011
- Login to your Toolkit and then select Website Editor.
- Select Custom Website Designer.
- Select Colors and Settings.
- Scroll down to the Banner section and select Change Slides.
- If you would like to upload your own custom photos, select 'Custom Files Management.
- You will then be able to scroll through your computer to upload your photos.
- Now go to the Custom Files tab and you will be able to select and order your custom photos. Select Save when finished.
- If you would like to use the default photos, select Media Library.
