Listings by Email
From PropertyMinder WIKI
(Difference between revisions)
| Line 24: | Line 24: | ||
#:[[File:Lbe_02.gif|border|link=http://wiki.propertyminder.com/images/0/02/Lbe_02.gif]] | #:[[File:Lbe_02.gif|border|link=http://wiki.propertyminder.com/images/0/02/Lbe_02.gif]] | ||
# Click the '''Preview''' button to review the message or the '''Send''' button to send the message. | # Click the '''Preview''' button to review the message or the '''Send''' button to send the message. | ||
| - | |||
| - | |||
| - | |||
| - | |||
| - | |||
Revision as of 04:45, 23 June 2011
With the Listings by email tool, you can:
- Send one particular listing by email to anybody from your Contact List, to all your contacts, to a selected group or to a new email address.
- Send multiple listings by email to anybody from your Contact List, to all your contacts, to a selected group or to a new email address.
- Send the complete information about the listing(s), including the listing agent(s) information, if you are sending the listing(s) to your agent network.
- Add a customized message and format it with the available editor. You can add links to the message that accompanies the listing.
To send a listing or multiple listings by email:
- Login to your Toolkit and click Listings by Email.
- Enter the MLS number or multiple comma-separated (,) MLS#.
- Choose agent view or client view (select agent view if you are networking with other agents).
- When you choose agent view the complete information about the listing including listing agent information is displayed.
- Client view removes the listing agent's contact information and any agent-specific remarks.
- Enter the Subject of the message.
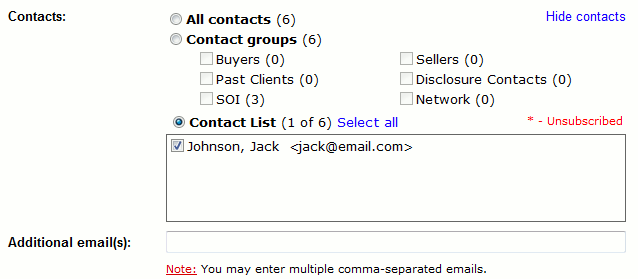
- Choose All contacts if you would like to send the listing to the entire contact list.

- If you would like to send the listing to a specific group(s), choose Contact groups and then check the desired group(s).
- Choose Contact List and check the desired contact(s) in order from the list.
- If you would like to send the listing to a new email address (or to add new email/s to the selected list of recipients), type new email(s) into the Additional email(s) field.
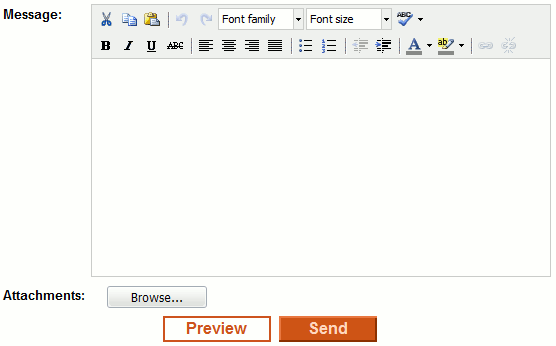
- Add the message, format it and add links in through editor.
- Click the Preview button to review the message or the Send button to send the message.

