Work with Groups
From PropertyMinder WIKI
(Difference between revisions)
| Line 1: | Line 1: | ||
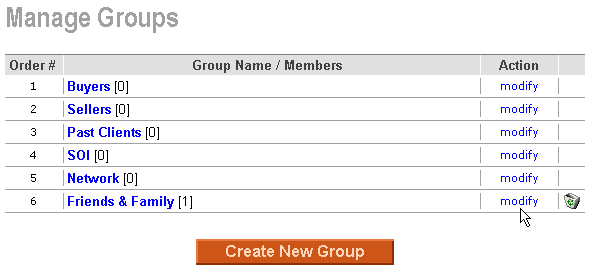
| - | + | You have an option to create contact groups that allow you to separate your clients into buyers, sellers, etc. | |
| - | + | ===To create a new group=== | |
| - | + | # Go to '''Client Relationship Management''' tool. | |
| - | + | # Click the '''Groups''' button. | |
| - | # Go to Client Relationship Management tool. | + | # Click the '''Create New Group''' button. |
| - | # Click the Groups button. | + | |
| - | # Click the Create New Group button. | + | |
# Name the Group and define its position in the CRM. | # Name the Group and define its position in the CRM. | ||
# You can add members from the other groups to the new group you have just created. | # You can add members from the other groups to the new group you have just created. | ||
| - | # Click SAVE at the end of the page to save changes. | + | # Click '''SAVE''' at the end of the page to save changes. |
| - | === | + | ===To build a network group=== |
| - | + | A network group is a special group of other agents of your office. PropertyMinder offers you to automatically load their contacts into special group. | |
| - | # Go to the Client Relationship Management tool. | + | # Go to the '''Client Relationship Management''' tool. |
| - | # Click the Import Contacts button. | + | # Click the '''Import Contacts''' button. |
| - | # Click the link Load My Office Agents. | + | # Click the link '''Load My Office Agents'''. |
#; [[File:Crm_load_my_offices_agents.jpg]] | #; [[File:Crm_load_my_offices_agents.jpg]] | ||
| - | # Click the Upload button to add all your office agents in the list to your Network group. | + | # Click the '''Upload''' button to add all your office agents in the list to your Network group. |
| + | |||
| + | |||
| + | ===To add contacts into groups=== | ||
| + | |||
| + | There are several ways of adding contacts into groups. | ||
| + | |||
| + | First of all, when you upload contacts from any other CRM you have an option to chose a group you would like to add these contacts. | ||
| + | |||
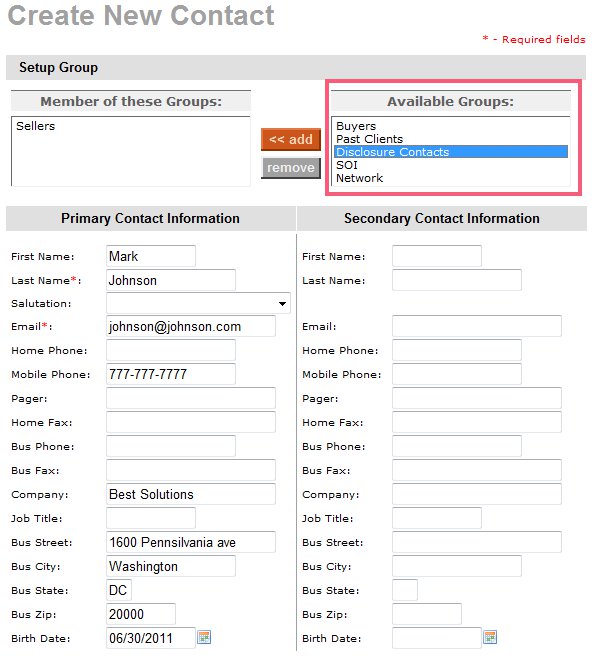
| + | Another way is to add a contact into different groups. | ||
| + | [[File:Create_new_contact.jpg]] | ||
===How can I send a message to an entire group?=== | ===How can I send a message to an entire group?=== | ||
Revision as of 01:59, 16 June 2011
You have an option to create contact groups that allow you to separate your clients into buyers, sellers, etc.
Contents |
To create a new group
- Go to Client Relationship Management tool.
- Click the Groups button.
- Click the Create New Group button.
- Name the Group and define its position in the CRM.
- You can add members from the other groups to the new group you have just created.
- Click SAVE at the end of the page to save changes.
To build a network group
A network group is a special group of other agents of your office. PropertyMinder offers you to automatically load their contacts into special group.
- Go to the Client Relationship Management tool.
- Click the Import Contacts button.
- Click the link Load My Office Agents.
- Click the Upload button to add all your office agents in the list to your Network group.
To add contacts into groups
There are several ways of adding contacts into groups.
First of all, when you upload contacts from any other CRM you have an option to chose a group you would like to add these contacts.
Another way is to add a contact into different groups.
How can I send a message to an entire group?
- Login to your Toolkit and select Client Relationship Management.
- Select the underlined Group that you would like to send a message to.
- You will be given the option to Send Message. That will allow you to send a message to the entire group.
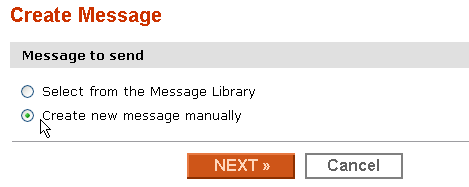
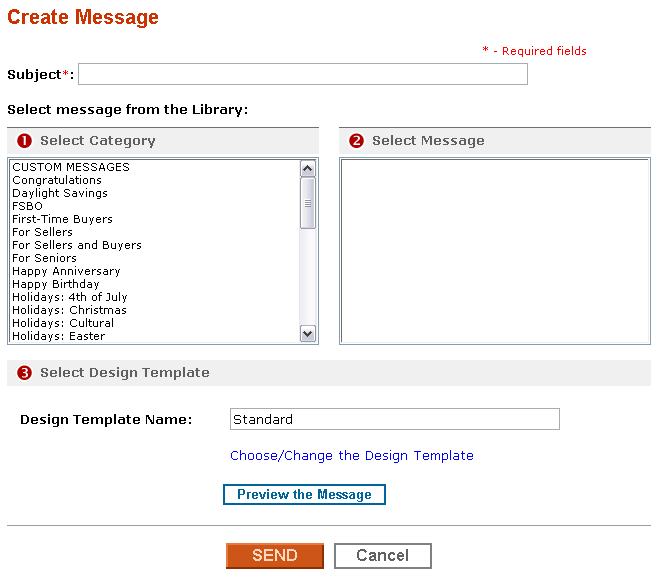
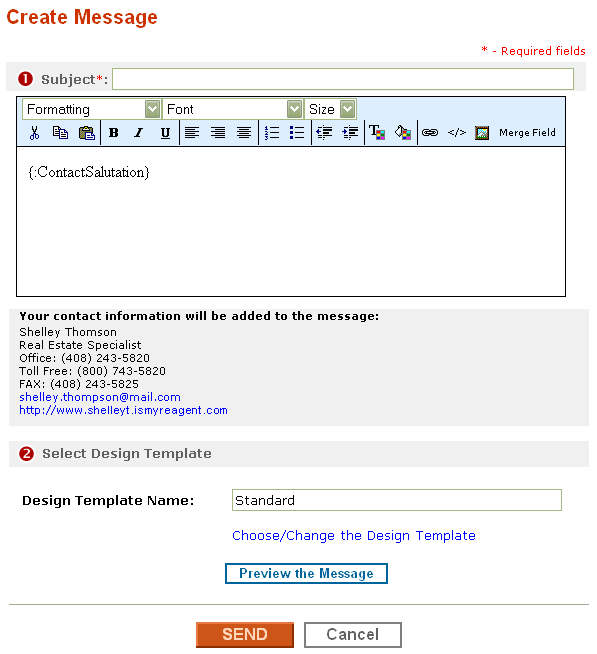
- You will then have the option to select an existing Message from the Message Library or you can select Create new message manually.
- If you choose a preexisting message from the Message Library, you will be taken to the Library. You will then be able to select which message is most appropriate.
- If you manually create your message, you will have a blank template.
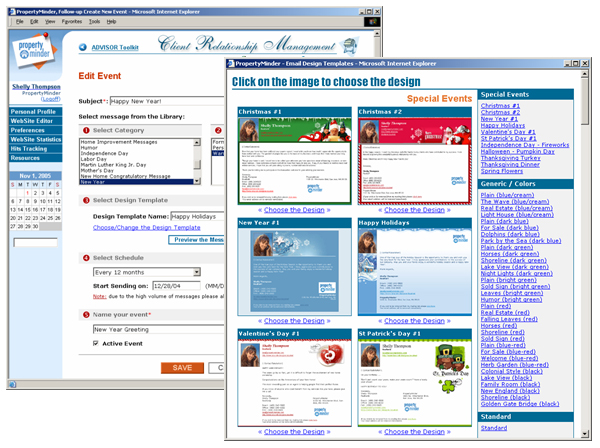
- You can select Choose/Change the Design Template to add a nice template for your message.
Please be sure to Preview your message before you send it to your Group
How do I remove a contact from a group without deleting the contact record?
- Login to your Toolkit and select Client Relationship Management.
- Select Groups.
- You will be taken to the Manage Groups section. You can create, delete or modify existing or new groups. Select Modify to add or remove contacts from the Group. Contacts can be members of multiple groups.
- When you select Modify, you will be taken to the Edit Group page. You can now add or remove contacts from the group.
- Click Save.
